April 2018 Demo by Robin Barlow
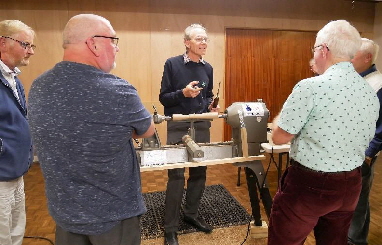
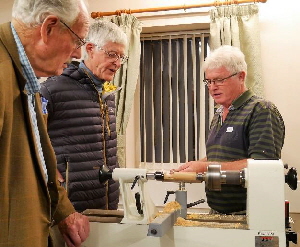
There was a good turnout for Robin’s demo including two visitors. The Challenges were entered in large numbers and were to a very good standard. Well done to the Turners and Advanced Turners who were placed. Better ‘luck’ next time to those who weren’t. After a quick EGM to alter the constitution and some notices we were ready to go.
Robin started his demo with lots of advice for beginners and the more experienced alike. The advice ranged from the outer clothing we should wear to protect ourselves, footwear, dust mask options, the safe handling and placing of tools just used somewhere safe, stance and presentation of the tool using the A B C procedure. Anchor the tool on the rest, Bevel contact with the revolving wood before, Contact with the cutting edge of the tool by lifting the tool handle gently until small shavings are taken. All good practical advice and he went on to remind us to always have the speed at minimum when starting and using the chuck to slow the piece down so that the chuck doesn’t unwind and go walk-about. Chucks have very sharp machined edges, as I know to my cost, so he explained how he had ‘softened’ the sharp corners with a fine file to make the technique of slowing down the revolving piece safer. There were lots and lots of other pieces of advice aimed particularly at beginners that I may have missed reporting but in my defence, they were coming thick and fast!
The project for the demo was to be an acorn box on an oak leaf platter. The acorn cup/box base would be made from walnut, the acorn /lid from ash and the platter from oak. Stressing the safe way to turn he turned the square block of walnut into a cylinder, marked out what would become the cup hollowed out the inside with a swept back bowl gouge and finishing the surface with a round nose negative rake scraper. The outside was turned into shape leaving an over large ‘stump’ which would be made into the stalk and in the meantime provide a more stable support for the texturing of the cup using a burr cutter in a Dremmel type of tool. The piece including the stalk was sawn off rather than parted off using a Japanese type of pull saw. After using the saw to get a rough curved shape for the stalk he then used the dremmel with burr cutter to sculpt the stalk to a very natural looking shape.
The second half of the demo continued after coffee, cake and the raffle with the production of the acorn nut lid. The mounting in the chuck, the turning of the square blank, hollowing and shaping were done in much the same way as the cup and the fine tuning to get the size of the join was done gently to effect a good fit. The oak leaf blank had been cut roughly on the bandsaw at home to look like an oak leaf in plan form plus a recess had been drilled for monting in the chuck. With the blank mounted Robin turned the underside of the platter in a gentle upward curve making a chucking spigot as he went. He reversed the leaf and turned the upper surface achieving a uniform thickness.
Finally the pieces were polished using the three stage wax procedure on lathe mounted buffing wheels. Having received an enthusiastic round of applause from a very appreciative audience he very kindly offered the finished project to us for a future raffle. Thank you Robin.
Tim Aaron
Shropshire Association of Woodturners
Event Reports for 2018
May 2018 Demonstration by Paul Hannaby
Paul’s demo attracted about 25 members and visitors to our May 23rd meeting and it proved to be a very informative and enjoyable evening.
Paul did two projects, the first of which was a bowl from a piece of elm. He started with good advice on tool sharpening and safe tool presentation to the revolving blank. Where one gets tear-out on a piece of work he advised applying sanding sealer to ‘harden up’ the fibres then very fine cuts with sharp tools. A good tip for us when trying to achieve a regular curve was to us a glue stick and holding the ends lay it on the surface of the bowl and press the ends until they touch the surface. Any light that shows through between the stick and the piece shows you the low points. Keep removing the high points and rechecking until there are no undulations left on the surface. Another piece of good advice concerned toolrest stability. With the banjo at 90 degrees to the lathe bed it is being supported by the shortest distance but if the banjo was anchored at 45 degrees to the bed then the amount of support in massively increased and therefore less movement of the toolrest when turning. All very logical but not necessarily obvious to the less experienced among us. Further advice was given on stance and movement when turning longer pieces. The inside of the bowl was turned in one go but we were advised that if the bowl had been deeper we should take the walls down to final thickness in multiple stages to avoid the thin walls ‘bouncing’ and thus becoming uneven in width. If when turning you get ripples on the inside of bowls resharpen the tool and make very, very gentle cuts.
After our usual break for the raffle, teas, coffees and cakes we got back to the demo and this time Paul had a ‘green’ piece of Holm Oak (which isn’t an oak apparently!). The piece was a length cut semi-circular in cross section and held between centres. He adjusted the piece to achieve equal heights of the natural edges before tightening up the tailstock. The four-point drive centre was used to cut through the bark to get to the solid wood underneath by rotating the piece by hand whilst tightening the tailstock (thereby cutting away the bark). Next he turned a chuck spiggot on the flat side (base) and turned an ogee profile on the underside using light cuts from edge to centre to preserve the natural edge. Reversing the bowl and putting the spiggot into the chuck he began to hollow out the bowl following the outside ogee profile. A bright LED light source was used to achieve a constant wall thickness. Having removed the bowl from the chuck he reversed it onto a domed support held in the chuck and reshaped the spiggot for a foot then sanded out the centre .
For second month running we were inundated with good advice and tips to make our turning better and safer. Thank you Paul for a very entertaining and inspirational evening.
Tim Aaron
June 2018 Demo by Les Symonds
How boring it would be if all demonstrations were the same… Les was a bit different. Not many demonstrators would get away with 15 minutes of talking before switching on the lathe. But with tales of tree trunks rescued from lake Bala, working with local green wood, enthusing about coarse grain and a blow torch, and recalling intriguing career changes - in that soft south Wales lilt – Les did.
Meanwhile a large square sawn block of oak was waiting between centres on the lathe. Maybe I missed something but I don’t recall Les introducing what it was he intended to make until a while later … It was a bit of a mystery tour for a while. Watching and listening to the edges slowly being knocked off became quite meditative.
Then it was rounded – and it all got quicker and busier and more interactive.
“Split turning” – I wasn’t sure what was meant at first, but “How to create a hollow form without expensive hollowing tools” made sense. Do it in two halves and then glue them back together.
Start with the cylindrical blank. Cut a spigot at each end. [Identify hazards and judge the risks. Work accordingly.] Shape the form roughly – with Les’s tool-to-go-to and more-versatile-than-you-thought roughing gouge, resorting to spindle gouge for the tighter curves. Now information and tips came thick and fast. Mark and part the piece at the flattest point. Finish parting with a saw. Think carefully about re-matching grain patterns later. Make a fillet to emphasise the join if the grain is intricate – to disguise any mismatch where it has been parted. Now with a bowl gouge, hollow the bottom half, leaving plenty of wall thickness to finish the outside later. Leave weight in the bottom for stability. Use a parting tool to cut a neat rebate for locating the top half and set aside. Mount the larger top – carefully – and hollow even more carefully. Match the wall thickness to the bottom – and leave the neck solid for now. Carefully again, cut a step to fit into the rebate on the bottom.
“The quality of the join depends on the glue used.” Self-deprecatingly, Les advised choosing your glue when you have made your join. If you have got it tight then PVA based adhesive will soak into the fibres and bind it tight. If you have gone a bit loose, then epoxy works better with some space to fill. How reassuring!
So, glue the top and bottom together, matching the grain and leave to dry. Which was Les’s Blue Peter moment – and the one he’d made earlier had a scorched featured join – so obvious, it would distract from any interruption of grain pattern. Mount the whole piece by the base, supporting the neck with the tailstock. Now for the more delicate bits. Finish the outside shaping and detailing – in Les’s case with the roughing gouge (other tools are available). Take away the tailstock centre and replace with a drill to go through the neck into the hollowed space. Then the trickiest bit –with the whole piece supported only in the chuck, very carefully – small gouge here – work down the inside of the neck to match the outside profile. Design tip: wider opening means you can better see what you are doing inside; narrow opening means no-one can see what you’ve done. Hmmm. Keep sideways pressure on the piece to a minimum at this stage to avoid pushing it off-centre. When that is done and finished, reverse the piece onto a jam chuck cut to fit the neck, support the base with the tailstock and finish off the base.
Les didn’t get as far as a completed piece – but he didn’t have to – and he didn’t obsess about it. We knew by now how to get there.
At the end I felt that I had plenty of useful tips to take away about techniques, design decisions, safety considerations and tool choices. And I felt inspired to have a go at a version of this one myself. And that, I think, is a worthwhile measure of a good demonstration.
Graham Patient
August 2018 Demo by Emma Cook
The guest demonstrator this month was Emma Cook, ‘the Tiny Turner’ . She was held up by the traffic and horrid weather on her way from Yorkshire but had many eager helpers to bring her gear into the hall to get her set up in good time. An excellent demonstrator and turner Emma explained that she would be making a decoration, possibly for Christmas, from a 20/25 cm long by 4/5 cm diameter piece of rippled sycamore. The decoration would comprise an 8cm hand blown glass globe (which would be filled with a string of 20 LED lights), a 7cm turned piece (from which it would hang with the use of a ribbon) and below the globe a 12cm finial. The finial section was turned first during which Emma gave lots of advice on tool presentation and the need to keep resharpening the various gouges in use.
After the tea/ coffee break the top section was turned with a hole drilled through its length to enable the string of 20 tiny lights on a string of copper wire to be fed into the globe. The hole was also used to feed through the ribbon to hang the finished piece. The top was turned to reflect the finial below. The three parts of the decoration were glued together
Throughout the evening Emma gave very useful tips and advice on how to achieve good results at each stage. It can be difficult for a demonstrator to pitch their demo at the right level for the audience but Emma’s Yorkshire accent and down to earth humour managed this very well indeed. Even when she was slightly rude about some of us of advanced years probably having bad hearing we all still loved her. Emma finished the evening with a short session on sharpening tools free hand. She made it look very easy but also inspired confidence to have a go. Following her comments about spindle gouge shoulders being either flat or convex I shall be checking that my spindle gouge doesn’t have concave shoulders! Judging by the number of bauble kits that were sold, Emma’s decoration was a big hit with the club members and it would be interesting and fun to see a display of all our achievements nearer Christmas.
Thank you Emma for a great evening.
Teresa Goodricke
Club/Visitor Night – September 26th
Once more we had a good number of members attending the evening. Stuart Ray and Andrew Thomson manned our two lathes with many interested in the turned items being produced. Some had a go on the lathes and took the opportunity of having some guidance in their techniques. John Gibbons manned the sharpening table and again this proved very popular as all turners know – a sharp tool produces better turning!!!


The sale of the wood and blanks that the Club had accumulated for the members to buy went exceptionally well with some members taking armfuls out to their cars. I hope we see some lovely turnings brought to the club meetings that have been produced from this bonanza.
Carol
October Seminar with Les Thorne
This year we were very fortunate to snare Les Thorne for our seminar and what a brilliant day it turned out to be. Those attending arrived in good time and the committee had the room set up in advance with Carol’s direction in evidence.


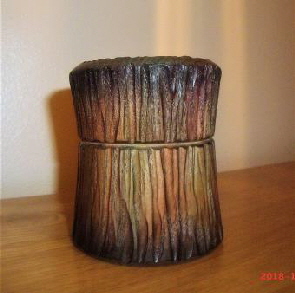
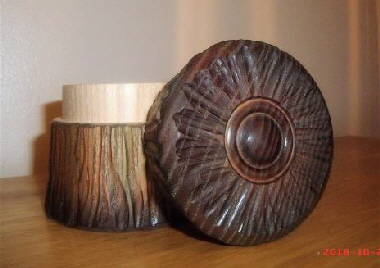
Les kicked off with a ‘signature’ box. For those of you who know him you wouldn’t be surprised to learn that throughout the day he peppered his demo with good advice and humour. Techniques and tool selection advice abounded as he went about the business of hollowing and shaping. Great care was taken in achieving the correct smooth fit of the lid before he textured the whole box with an Arbortech. Next, he applied coloured stain using an airbrush. The effect was superb. The bar had now been set very high!
Lunch, prepared by Carol and John and served by Carol and her friend, Peta, was another wonderful success and received unanimous praise. Thank you again Carol (and her ‘helpers’).
The next item to be demonstrated was another ‘signature’ piece. A small bowl with a beaded decoration both outside and in was the item and again it was a great demo.


The internal beading ‘descended’ from the rim into the bowl for about one third of the way down with the internal base left natural wood. The beading was ebonised then liming wax applied to bring out the grain. The bar continued to rise!
There was more fun to follow after the tea/coffee break. ‘I’m going to make a mess now, but it will clear up easily’ said Les and brought out a piece of what he described as ‘firewood’. A piece of very wet sycamore appx 10” long and 7” diameter went on the lathe. Ribbons of shavings, some several metres long came flying off his turning, draping the camera arm and the TV stand in spectacular fashion. Les began to turn a shallow goblet shape and then asked for the overhead light to be turned off. He brought out a small light and proceeded to hollow out a very thin natural edged goblet bowl with the light shining into it. Breath was held as he turned it thinner and the light shone through beautifully but all was well and the bowl of the goblet was finished – we all breathed again! Unfortunately, just as he was finishing the goblet base, he had a catch and a small piece of the base broke off. ‘If that happens’ he said, ‘just turn the base off and make it into a shorter one!’ In the last half-hour he entertained us with a fascinating show of basic spindle work using a variety of woodturning tools and then demonstrated that you don’t need anything expensive to turn beads and coves by using a normal woodworking chisel and finally a screw driver! An excellent Seminar for all those who attended. Tim Aaron (and Carol!)