January Challenge
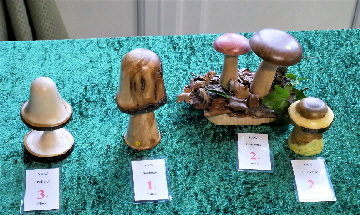
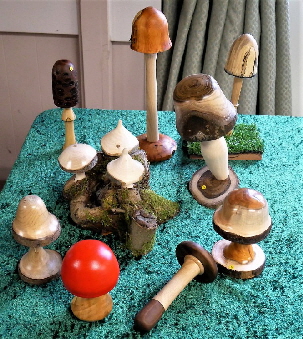
We started a new year of challenges at the Woodfest with ‘A mushroom or toadstool’ for the Turners and ‘An off-centre item’ for the Advanced Turners. I have to say the array of mushrooms and toadstools of all shapes, sizes and colours was more than impressive. Enough to grace any woodland floor!
Below left are the winning entries in the Turners section. First was Nigel Goodricke, joint second, Bill Clyne and Graham Patient and third John Pitt. Very well done to all who entered.
The other brilliant entries are in the right . **Can you spot the odd one out?
Shropshire Association of Woodturners
Event Reports for 2019
January: Woodfest
Last year we had problems with snow for several months off and on but the Woodfest in January was a day when members could get to us without problems and we had an excellent turn-out to the event with members and some visitors enjoying the afternoon.
John and I had bought on behalf of the club quite a lot of tools and blanks over the last few months and they were certainly popular! Everything was set out by the committee along with other stocks of wood we have in the storeroom at Bicton.
Sales of wood, tools and Abranet came to just over £400 and as the stuff we bought last year came to £280, we have already made a profit for the club with some things left to sell at the next Club Night.
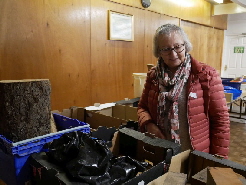
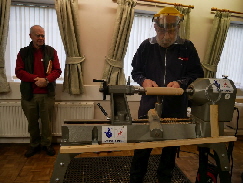
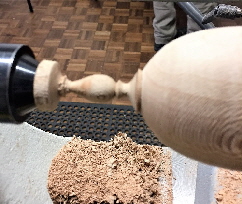
In the pictures are Teresa trying to decide on the ‘must have’ blanks and also John doing some spindle work on one of the club lathes.
I hope lots of the wood and blanks we sold will be coming back to the club as challenge items in the near future.Carol
Mark for remounting then remove the bottom and mount the lid. Square off the end then cut the recess almost to fit the base but not quite. Hollow then shape the outside of main part of the lid, leaving enough waste to finish the finial later. Finish the inside then remove the lid and remount the base. Adjust the tenon for a tight fit. Put the lid on the base and support with tailstock. Remove some of the bulky waste, clean up the joint and overall box shape, then create the finial (swopping to a smaller spindle gouge). At this point, Steve went for an acorn finial - which he then decided was too heavy/ not right so he turned down to a slenderer and aesthetically pleasing tear drop. We can all do that!
Then the arty bit. Steve cut black lines to disguise the join, and used them to define areas of texture - some created with a Sorby wheel, others with a Dremel cutting tool. Then finish the finial - sand it and part off.
For the colouring Steve airbrushed dark colours on the non-textured areas, then black onto textured, finishing with yellow all over. Dry thoroughly then sand black to remove high points, and cut back coloured areas with wire wool. Brush clean then cover all with acrylic sanding sealer. Dry, then a top coat of acrylic lacquer. Finally reverse the base onto a jam chuck, remove the spigot and finish the base. The end result was impressive.
February: Steve Heeley Demo
It was good to welcome regular favourite demonstrator Steve back again. Recent illness and enforced absence have clearly taken a toll, but his dry sense of humour and enviable skill were evident as usual. This time it was a coloured textured lacquered box - the examples Steve brought were all gallery show pieces.
Again, Steve's demonstration is difficult to put down on paper - the detailed advice, tips and demonstrated techniques are so many, to record them all would produce a comprehensive woodturning handbook. At one point he demonstrated three different tools and techniques for making the same cut. Steve is far from prescriptive. He positively encourages choices, personal decisions and creative options. His familiar mantra, "if you don't like it, don't do it.".
He followed the standard routine for boxes: rough out to a cylinder, put a spigot on both ends and part where you want the lid and bottom to join. Shape then hollow out the bottom. Don't finish the outside, but do the inside. As ever Steve emphasised care and precision when finishing and cutting the lip to take the lid. Skew chisel was his favoured tool for that - roughing gouge for outside shaping.
Paul Hannaby - March 17th - Demo
It was no surprise when the top half of the natural edge yew goblet broke and flew off the lathe; we were prepared for it. The potential problem of the pith in the yew log running too close to the goblet stem, and not being able to know how deeply the obvious cracks at the end penetrated, were issues that Paul had acknowledged at the start. In the end, for anyone newish to wood, that was as much a lesson as the careful processes and choices that went into the nearly-finished goblet. If the finished piece is not going to be too precious, who would discard a possibly good piece of wood?
It was, prior to the break, a straightforward natural edge goblet. Paul roughed down the bottom part of the blank, leaving plenty of natural edge to work on at the top. Create a spigot at the base, reverse into the chuck and start with the inside of the cup which Paul hollowed, sanded and finished before moving on. (Paul's array of tools was interesting - nothing too fancy or expensive. Most of the initial outside shaping was done with a sharp spindle roughing gouge and most of the hollowing with a good old ring tool and a simple scraper. Reassuring that professional standards can be achieved thus.) Then, supporting the cup with a polystyrene ball/ tailstock, shape the outside of the cup, add detailing to delineate cup/stem join, then work little by little down the stem. Finish by shaping the foot. Sand, seal and wax. Then part off. And it was at this point we all found out just how extensive those cracks were as the thin stem wobbled enough to split and the cup went flying. It didn't unduly bother Paul. It happens. It was a useful lesson.
Where the first half delivered plenty of advice, reminders and useful tips for less experienced turners, the second half moved on to a less ordinary twisted stem goblet - from a cherry blank with no risky pith or cracks. Where the yew was to be purely decorative (yew is not food-safe), the cherry goblet could be a practical drinking vessel. Paul had some good advice about design/sizing: stem length to fit a hand but not too long, and rather sturdier (5-6mm) for stability - and a foot roughly the same diameter as the cup opening for the same reason. And for a reliably non-porous goblet, finish with Rustin’s plastic coating or Chestnut melamine
The initial process was much the same - but leave the stem about 10-12mm thick to cut the decorative twist. (Paul recommended about three-and-a-half inches depth for the cup - a healthy bilingual and approximate approach to measurements.)
With the cup finished and supported, time for the decorative work on the stem - all done with a range of round/needle files, a stick and sandpaper. Hold a rough file at 45 degrees at the base of the stem - rotate by hand and let the file cut a spiral along the stem to the top. Repeat with other files to cut deeper and wider, changing the angle to 90 degrees to round the edges. Paul then cut a second spiral starting opposite the first at the base. (There could be any number.) Final sanding was done with the lathe running slowly - drawing sandpaper/stick over the grooves then finishing with folded sandpaper, working through the grits.
To complete the goblet, define and shape the foot, finish and part off.
It was a relaxed, low-key demonstration - more like sharing Paul's workshop than watching a performance, as he chatted through the projects. There were lots of shared tips and advice and a new technique for everyone to try and experiment with. Twisted pestles and mortars anyone? A useful and reliable afternoon. Graham Patient
May Demo – Mick Hanbury
Congratulations and gratitude to John Griffiths for coming up with such a high quality and varied programme of demonstrators for the club. After April's absorbing precise technical session on threading with Jay Heryet, in May we welcomed Mick Hanbury with something completely different, yet equally absorbing and inspiring ... let the artist free!
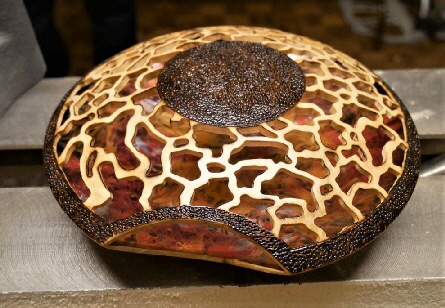
First do the turning to the highest possible standard - of course - but then colour it, cut it, punch holes in it, decorate it as the artistic fancy takes you. Only woodturners will look for tool marks and chucking points - the bigger wider audience will admire overall form and effect.
With easy-going confidence and humour, Mick demonstrated just such a project that he has been working on for some time - "conversation piece" - two decorated hollow discus shaped pieces mounted on metal rods on a wooden base "talking to each other". A sculpture. Not your average SAW challenge!
The first stage - the turning - was accomplished with all the care, skill and precision to be expected from a turner of Mick's calibre. From two matching sycamore blanks (6inches diameter by 1.25 thick) he produced two exactly paired shallow thin-walled bowls, leaving a foot and spigot on each. (Excellent advice about the benefit of precise sized spigots.) Then colour the inside of the "back" piece (to be viewed through the punctured front). Glue the two together (having marked the coloured back) and leave to dry thoroughly. Finish shaping to a smooth sharp-edged discus, always being aware of the thin walls - taking off the spigot and foot from the front.
Although there was not enough time to complete the whole process, Mick explained the creative stage and passed examples round. Decorate the front. Drill holes or punch and cut shapes through the face to expose the coloured interior face. Cut a "mouth" - a wedge shape from the perimeter. Sand and finish. Then reverse into a jam chuck and remove spigot and foot from the back, maintaining the smooth curve. Sand and finish. Later, mount on a metal rod in a wooden base to be displayed with a paired piece "in conversation".
A stunning combination of craft and art, with, unapologetically, no other function than to dazzle, inspire and amuse... Now there's an idea for a club challenge!
Thanks to Mick for a highly entertaining and inspiring evening - for what he did but also for what he had to say. Graham Patient
Editor’s Note – Mick said the last time he had been to our club was when we met at the Cock Inn, - a looooong time ago! He also said he thoroughly enjoyed the evening and that it seemed to be a very friendly club! - A lovely compliment!
June Demo – Phil Irons
Phil Irons states he is 5 feet 19 inches tall, I think he is being modest. Our attention was first gained by an interesting arm contraption used in conjunction with a long handled hollowing tool to hollow a piece of burr elm. Following the intros and some banter about cricket - Phil is an Aussie - the demo began.
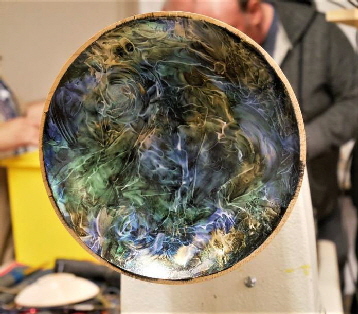
With the now hollowed burr elm on the lathe it was clear there were a number of cracks and fissures in the wood. A “V” shaped tool in a dremel style gadget was used to clean out and enhance the “faults”. Then began the messy bit, on a board 200 mesh bronze powder was mixed with 2-part epoxy resin. This has to be worked together quickly to create a putty-like consistency, then worked into the cracks with an artists’ small pallet knife. It looked as if the wood was having a mud facial. While the bronze filler was setting Phil put a large piece of damp apple wood on the lathe and turned it down using a 5/8” bowl gouge, his turning tool of choice. The long ribbons of wood, as always, fascinating to watch. Nothing further was done with this piece, I think Phil was just enjoying himself. He is also a big fan of using jigs to ensure consistency with tool sharpening, never a bad thing. Phil explained and showed photos of how he uses a mixture of wire wool or iron filings in vinegar. This, when applied turns the wood surface a different colour, often black, and can then be etched to create interesting effects. Back on the lathe the burr elm had its surface cleaned of the excess bronze filler with a triangular scraper. The finished surface, to this stage, was an interesting shape and the bronze in it did look beautiful. Next on the lathe was a small triangular shaped piece of wood that was turned into a cone shape with Phil’s favourite tool, the 5/8” bowl gouge, a small spigot was created and the sides textured and wire brushed to take off some of the roughness. It was then mounted in the chuck and the top surface made slightly concave. Once again, the surface was textured, wire brushed and painted blue with spirit stain. The centre was hollowed out and undercut, this bowl shape was painted with yellow spirit stain. Then on to finishing the bottom by reversing the bowl on the chuck, the jaws opening into the bowl, making sure it is running “true”. Phil used a 6mm spindle gouge, finger grind, to round off the bottom and paint it yellow - a rocking bowl.
Phil, as president of the AWGB (Association of Woodturners Great Britain) said he was trying to bring the organisation into the 21st century and encourage younger people. He seems the sort of person who could instigate change and reinvigorate woodturning to appeal to younger people of both sexes. The Aussie attitude. I think he looked at us and saw yet another group mainly of those getting on in years!
Teresa Goodricke
July Meeting – Club Night
Many thanks to those committee members and other members who worked hard to make this evening a success. There was a huge amount of wood and blanks for sale which had been very kindly donated to the club and the members attending all seemed to go home with a large boxful down to a small bag full of must-have pieces. Many of the blanks were of exotic and unusual woods and we are lucky to have this for the members to enjoy.
We also had both lathes out with Andrew Thomson, Ian Feldmesser and Stuart Ray doing some turning and a little tuition for the members who were looking at gaining a little more insight into the ‘joys’ of turning! John Gibbons brought in his sharpening equipment once again for those who needed some guidance in getting the most from their woodturning tools. Although the weather was very hot, we managed to keep cool enough with the doors open and I am thinking all the wagging tongues kept the air circulating – in the nicest possible way.
Members have told me that they do enjoy these evenings as they have a lot more chance to chat and pick up tips on turning and wood from other members. I do have to mention Teresa who brings in lovely cakes and biscuits for our breaktimes at the meetings and very well received they are too. I thinks her and Nigel will be on holiday for a while now so I am hoping the back-up team of Ted and Di Barber will be able to conjure up some treats for us? Carol
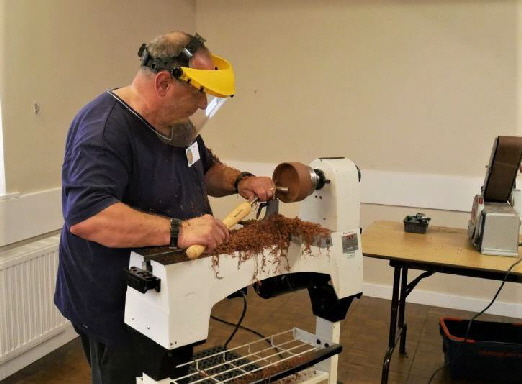
It was a fascinating evening. Chris announced his intention to demonstrate just what a blind turner could do. He mounted a round blank of olive ash which he had cut with his chainsaw earlier (what!). Pencil marks are pointless: he marked the recess on the base with a scratch awl – it’s all done by touch and feel. He shaped a foot with a parting tool, then the outside of the bowl with bowl gouge in shear mode. His mantra was stop-touch- relocate every time. It inevitably takes longer. He softened the dry punky wood with a lemon oil/beeswax paste to scrape, then again to sand.
Of course, pretty grain, fine figuring is all very good to the eye – but all the same without sight. Texture is what makes a piece interesting and attractive. So, Chris textured it ... with a Proxon power carver (and a protective glove). With the lathe stationary, using the indexing, he carved a series of organic grooves from base to rim. This he sanded with a powered bristle brush to smooth all edges. Relaxed and confident. Chris has a “memory map” for colour (and other visuals) as he lost his sight later in life.
Using that memory map, he visualised the colour effect he wanted, airbrushed the outside with black stain (judging by sound) – dried with a hairdryer, then stippled with copper then green acrylic paint. When he had dried the paint, he finished with lacquer. It was fascinating how Chris found his tools and materials more easily than some sighted demonstrators. Everything laid out precisely. At least being blind makes you keep a tidy workshop!
Throughout, Chris was telling his story – going blind at 39, his downs, his determination, his motivation, the bureaucratic route to acquiring a guide dog, acknowledging the support of Nicola, his wife. It is a remarkable human story. Chris reversed the bowl onto expanding jaws to hollow out with a hollowing tool. Here’s perhaps where we most appreciate the sense of touch – registering the thickness of walls as we hollow. But try closing your eyes and doing it ... When hollowed to Chris’s satisfaction he waxed then sanded the inside – keeping the dust to a minimum – then sanding sealer – then Yorkshire grit for a real smooth finish – then friction polish for that final silky shine. It looked impressive, but it had to be felt to be fully appreciated. Chris was clear – try new things, have fun, be creative! And he had some hair-raising “all’s well in the end” anecdotes about where that might lead a blind turner ... But it’s what drives him. I hadn’t known what to expect from the evening. I was left not a little in awe. It was an encounter that left me asking “could I have done that?” I don’t know how. The turning was impressive, but Chris demonstrated something vastly more than that. It was a privilege to be there. Graham Patient
Chris Fisher – The Blind Woodturner September Demo
All demonstrators give us something, be it tips, techniques, ideas, inspiration. It is difficult though to measure the breadth and quality of inspiration that Chris Fisher, “The Blind Woodturner”, delivered. Our sight we take for granted. It’s how we set up our woodturning. To lose your sight completely, then teach yourself to turn – not just turn, but to go on and qualify as the first (and currently only) blind Registered Professional Turner – to meet all the high standards involved in that - is hard to credit. Except Chris is here in front of us. And he has done all of that. With clarity, openness and humour – with absolutely no self-pity, Chris demonstrates not just quality turning, but a quality in human nature that we might aspire to.
